ソースはここに置いた。
- 準備
- ASP.NET MVCプロジェクトを作成
- プロジェクトプロパティの設定
- Silverlightアプリを表示する
- App、Assetsフォルダとファイルの配置
- AppManifest.xamlの設定
- App.xaml
- app.rb
- 表示してみる
- デバッグも大丈夫
必要なものはこの辺 ASP.NET 3.5 Extensions Preview を見て揃えておく。 あと、今回はDynamic SilverlightなのでDynamic Silverlight SDKはここDynamic Silverlightからダウンロードしたものを使用する(こっちのほうが最新)。
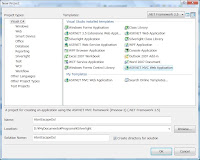
HtmlEscapeDslという名前でASP.NET MVCプロジェクトを作成する。
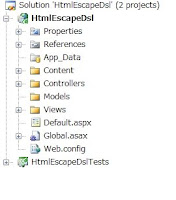
 作成直後のフォルダ構成。
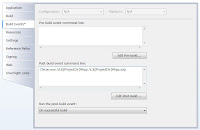
まずはBuild EventsタブでPost-build eventを設定。ここでXAPファイルを作成するように設定。ただしChiron.exeのパスは通しておく必要がある。
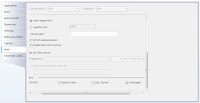
 次にWebタブでSilverlightをデバッグできるようにする。
表示はobjectタグで設定すればどこでも出来るのだが今回はSite.Masterに共通部分であるJavascriptとCSSの設定をして、Indexにobjectタグを設定する。
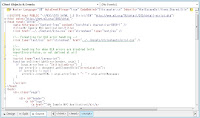
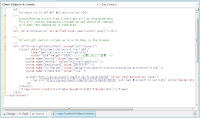 この状態でコンパイルして表示すると↓のようになる。まだ表示するXAPファイルが無いのでエラーになっている。
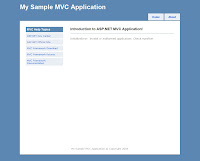
プロジェクトにAppフォルダとAssetsフォルダを追加する。AssetsフォルダにはCSSを追加。
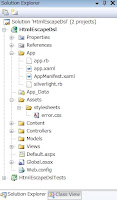 Appフォルダには必要なDLLを入れておく(XAPファイル作成の際に組み込んでくれる)。
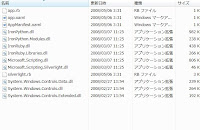 今回はIronPythonは使用しないので不要だが取り敢えず入れておく。
AppManifest.xamlの作成は、
Chiron /m /d:Appで作成されるが、これだとDynamicSilverlight関係のアセンブリが読み込まれないので以下のように手動でAppManifest.xamlを設定する。
<Deployment xmlns="http://schemas.microsoft.com/client/2007/deployment" xmlns:x="http://schemas.microsoft.com/winfx/2006/xaml" RuntimeVersion="2.0.30226.00" EntryPointAssembly="Microsoft.Scripting.Silverlight" EntryPointType="Microsoft.Scripting.Silverlight.DynamicApplication">
  <Deployment.Parts>
    <!-- Core DLR and DLR <-> Silverlight shim assemblies -->
    <AssemblyPart Name="Microsoft.Scripting.Silverlight" Source="Microsoft.Scripting.Silverlight.dll" />
    <AssemblyPart Source="Microsoft.Scripting.dll" />

    <!-- Language assemblies -->
    <AssemblyPart Source="IronRuby.dll" />
    <AssemblyPart Source="IronRuby.Libraries.dll" />
    <AssemblyPart Source="IronPython.dll" />
    <AssemblyPart Source="IronPython.Modules.dll" />

    <!-- Silverlight Controls -->
    <AssemblyPart x:Name="System.Windows.Controls.Data" Source="System.Windows.Controls.Data.dll" />
    <AssemblyPart x:Name="System.Windows.Controls" Source="System.Windows.Controls.dll" />
    <AssemblyPart x:Name="System.Windows.Controls.Extended" Source="System.Windows.Controls.Extended.dll" />
  </Deployment.Parts>
</Deployment>
下部のSilverlight Controlsを読み込むことでButtonやTextBoxが使用できるようになる。
以前作成したC#版とほとんど同じで大丈夫だがイベントハンドラ部分は削除する必要がある。イベントハンドラはapp.rbで登録と実装を行う。さらにx:Classも変更する(UserControlを継承したクラスを指定することは出来ないみたい。たぶんこの辺はSilverlight2正式版では開発できるようになると思うんだけどなぁ。そうじゃないと今のところ独自コントロールを読み込む手段がないし)。あと、これは必須ではないが名前もRubyの変数で一般的に使う形式に変更した方がいいかも。 全く同じだと面白くないので入力はWatermarkedTextBoxを使用するようにした。
<UserControl x:Class="System.Windows.Controls.UserControl"
    xmlns="http://schemas.microsoft.com/client/2007"
    xmlns:x="http://schemas.microsoft.com/winfx/2006/xaml"
    Width="400" Height="300"
    >

  <Grid x:Name="layout_root" Background="#FFBDD6DF">
    <Grid.RowDefinitions>
      <RowDefinition Height="0.4*"/>
      <RowDefinition Height="0.127*"/>
      <RowDefinition Height="0.473*"/>
    </Grid.RowDefinitions>
    <Canvas HorizontalAlignment="Stretch" Margin="8,8,8,8" VerticalAlignment="Stretch">
      <WatermarkedTextBox Width="384" Height="104" x:Name="wtb_input" Watermark="Input..." AcceptsReturn="True"/>
    </Canvas>
    <Button HorizontalAlignment="Center" Margin="173,8,167,11.1000003814697" VerticalAlignment="Stretch" Grid.Row="1" Content="変換" x:Name="btn_convert"/>
    <Canvas HorizontalAlignment="Stretch" Margin="8,8,8,8" VerticalAlignment="Stretch" Grid.Row="2">
      <TextBox Width="384" Height="127" x:Name="txb_output" IsReadOnly="True"/>
    </Canvas>
    <Button HorizontalAlignment="Right" Margin="0,8,8,11.1000003814697" VerticalAlignment="Stretch" Width="60" Grid.Row="1" Content="クリア" x:Name="btn_clear"/>
  </Grid>
</UserControl>
イベントハンドラを登録。ほとんどのことをSilverlightApplicationクラスがやってくれるのでコード量はかなり少ない。
System.Windows.BrowserのHttpUtilityもそのまま使えるのでHTMLエスケープ変換のコードもC#版そのままでOK。
require "silverlight"

class App < SilverlightApplication
  use_xaml

  def initialize
    btn_convert.click do |s, a|
      txb_output.text =  HttpUtility.html_encode(wtb_input.text)
    end

    btn_clear.click do |s, a|
      wtb_input.text = ""
      txb_output.text = ""
    end
  end
end

App.new
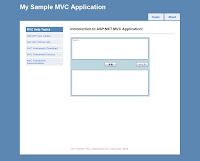 やっぱり日本語が入力できないぞ・・・。しかも今度はローカルでも入力できない。何か設定が必要なのかな。
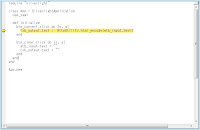
app.rb内のボタンクリックにブレークポイントを実行したところ。一応止まるしローカル変数の値も見られるが、F11でステップインは出来ない。Silverlight2正式版の時にはRubyのIntellisenseも動くようにしてほしいなぁ。
0 件のコメント:
コメントを投稿